Accessibility Services


Accessibility of document creation in PowerPoint 365 and PowerPoint 2019
The following guide describes how to make presentations in PowerPoint 365 and PowerPoint 2019 accessible. The first part consists of the basics that need to be considered when creating presentations. There is also an in-depth section. This deals with elements that do not appear in every presentation but still need to be considered when they are used.
There is information from Microsoft on accessible document creation. There is also a LinkedIn Learning course on accessible document creation for Microsoft Office, which employees of Bielefeld University can take part in free of charge.
Basic settings
To ensure that the font is easy to read, the following points should be observed:
- Use a sans serif font (e.g. Arial, Helvetica)
- Use a larger font size (18 pt or larger)
- Avoid very fine or very bold font weights
- Avoid narrow or wide font widths
- Line spacing should be 150% of the font size
- Use colours sparingly, black text on a white background is ideal
- Avoid the colour combination red-green and complementary colours (e.g. blue-orange)
- If a coloured background has been selected: ensure high contrast for the text
Reading order
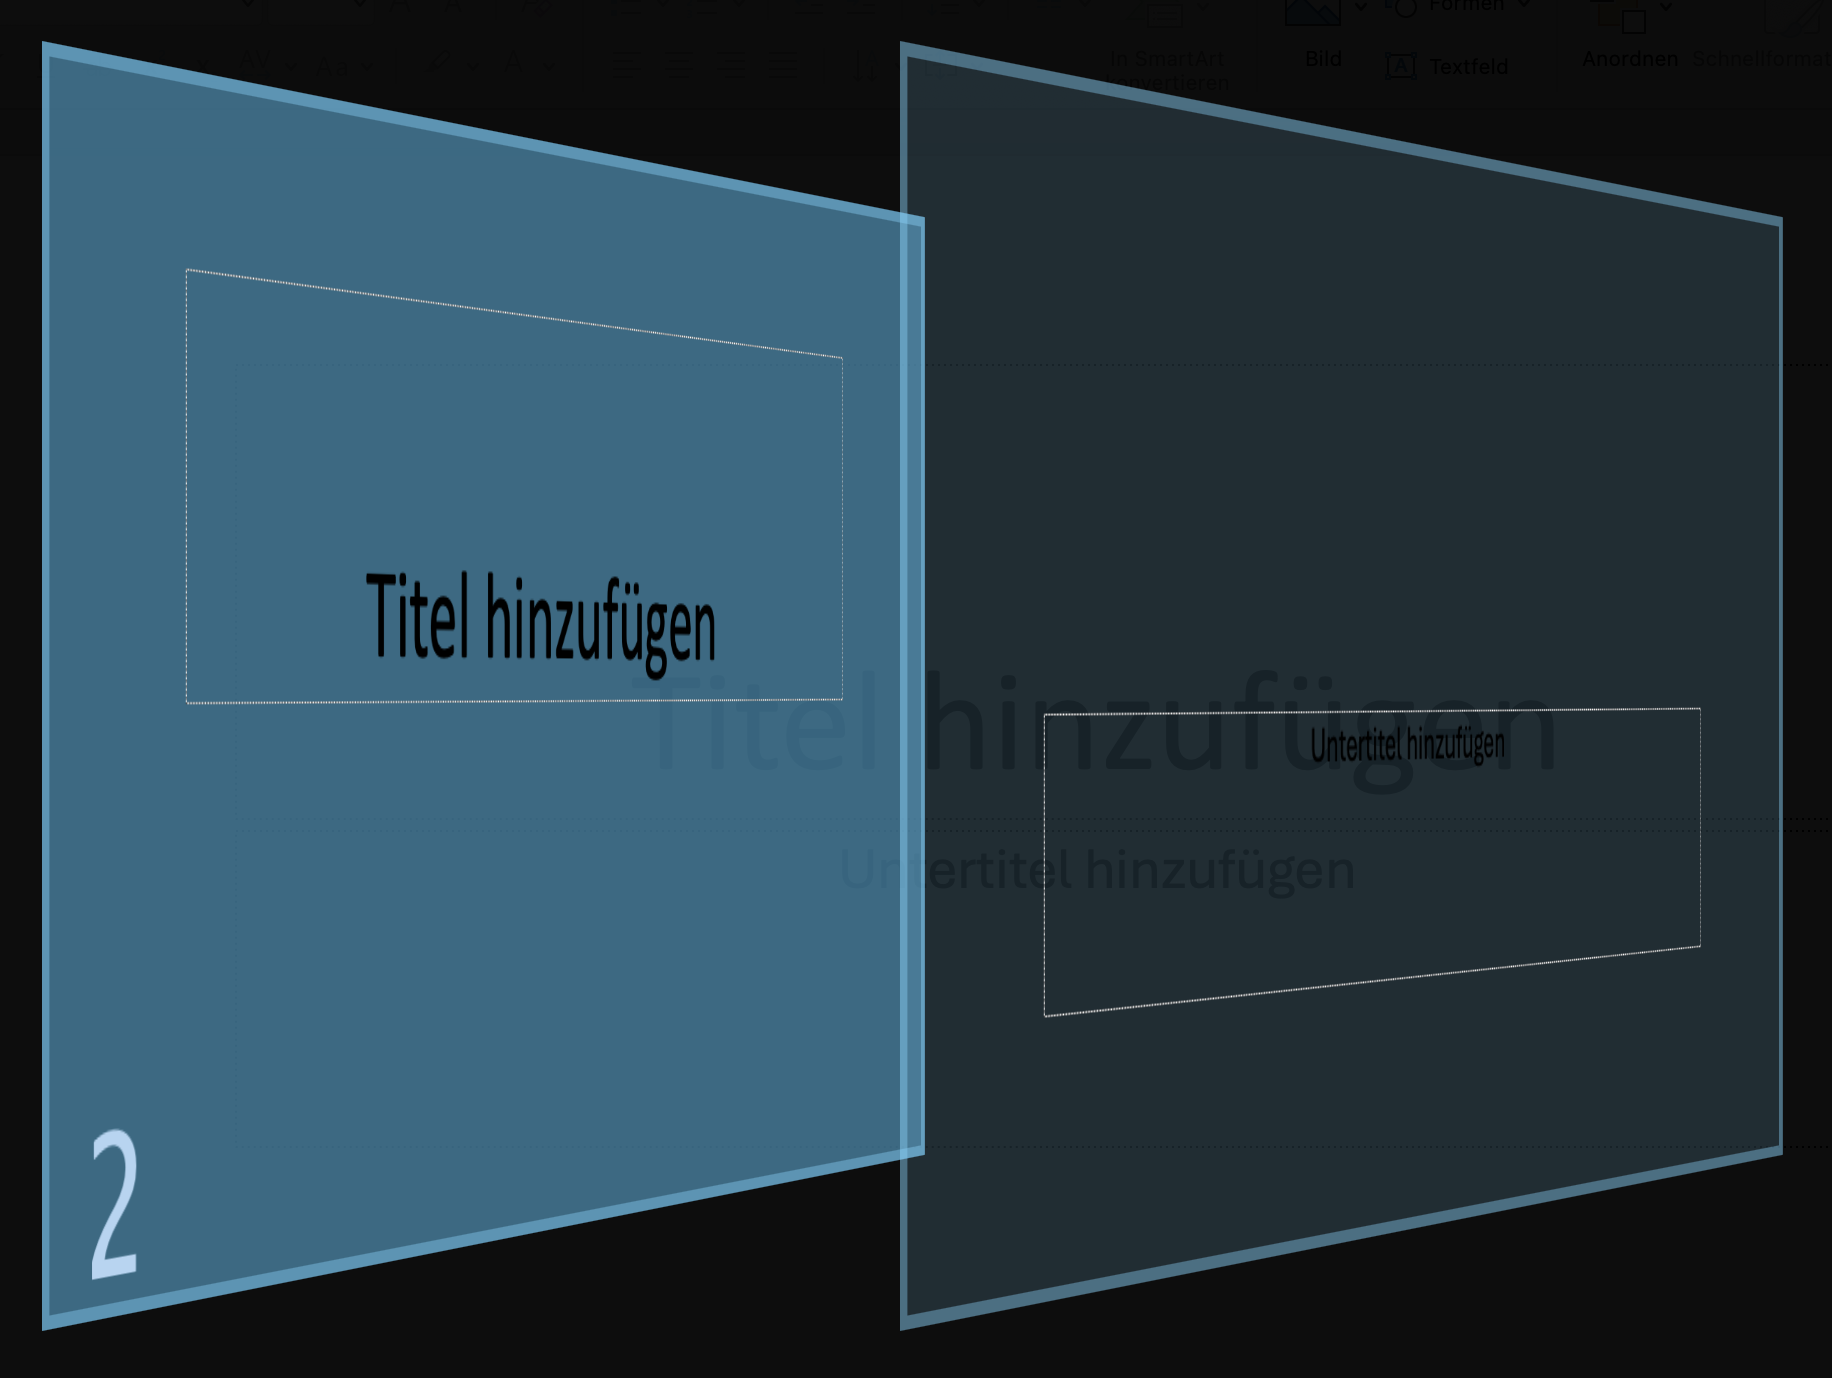
A screen reader reads out elements of a PowerPoint presentation in the order in which they have been added to a slide. However, this usually does not correspond to the order in which the slide would be intuitively read by a sighted person. Therefore, check the reading order as follows and change it if necessary.
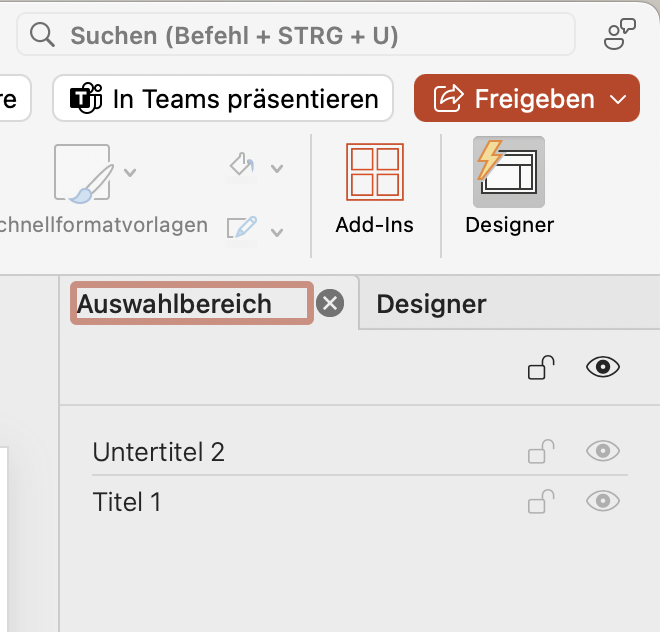
Select the Arrange option on the Start tab in the Draw area. Select the Selection area option from the menu.

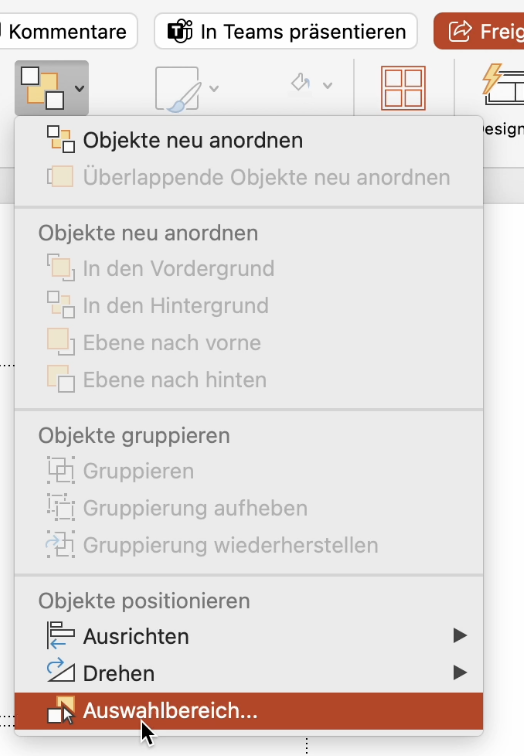
It is important that the objects are arranged from bottom to top. This means that the object that is to be read out first (e.g. the title) must be in the last position.
On macOS, elements can also be sorted using the Reorder objects option. You can drag texts and graphics to the desired position in the reading order.
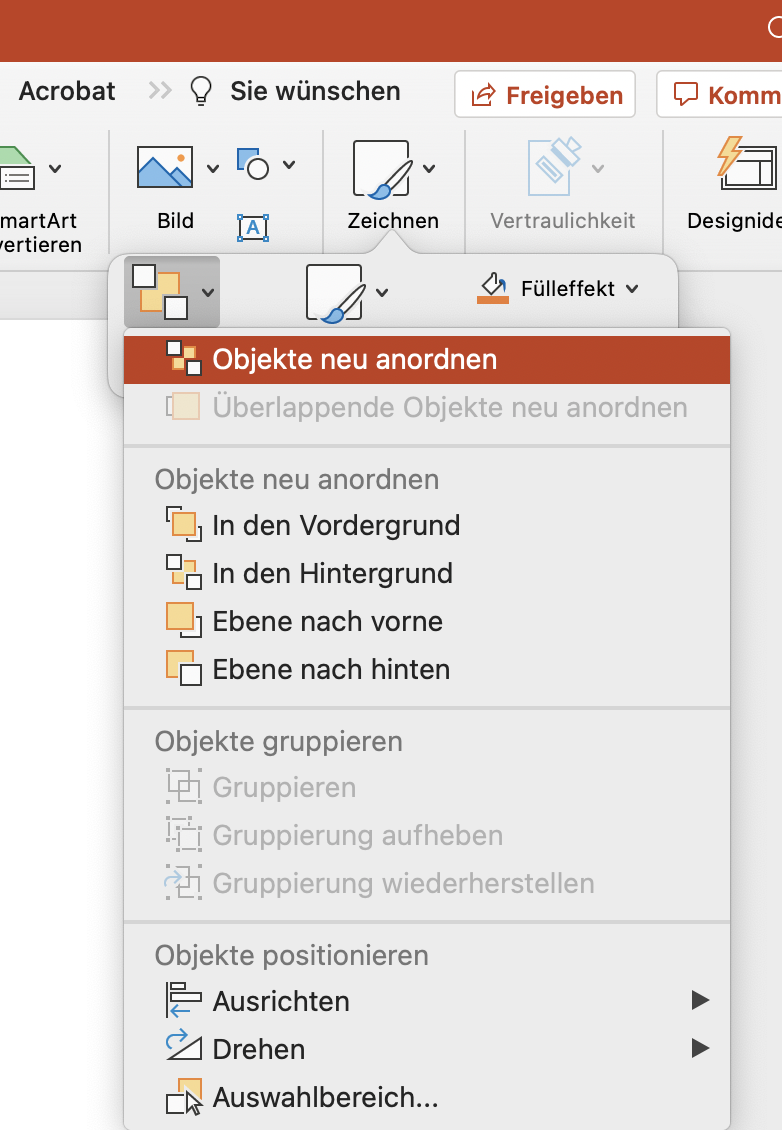
Here too, the objects must be arranged from left to right. This means that the object that is to be read out first (e.g. the title) must be in the left-hand or last position.
PowerPoint's integrated templates contain a predefined reading order. The slides created from a blank slide most likely require a manual definition of the reading order. It is therefore advisable to decide in advance in favour of an integrated PowerPoint template (see Using an accessible slide design).
Use of an accessible film design
A PowerPoint presentation should be structured as well as possible so that staff, people with and without visual impairments can easily absorb the content.
When you open PowerPoint, you will be displayed a selection of different templates. These templates are ready-made slide layouts that make it easier for you to create a presentation. If you apply the layouts when creating a presentation, they automatically ensure that the reading order works for every user. In addition, the slide designs, colours, contrasts and fonts have been designed to make the presentations as accessible as possible.
The advantage of using the ready-made slide sequences is that you do not have to adjust all of the above points manually.
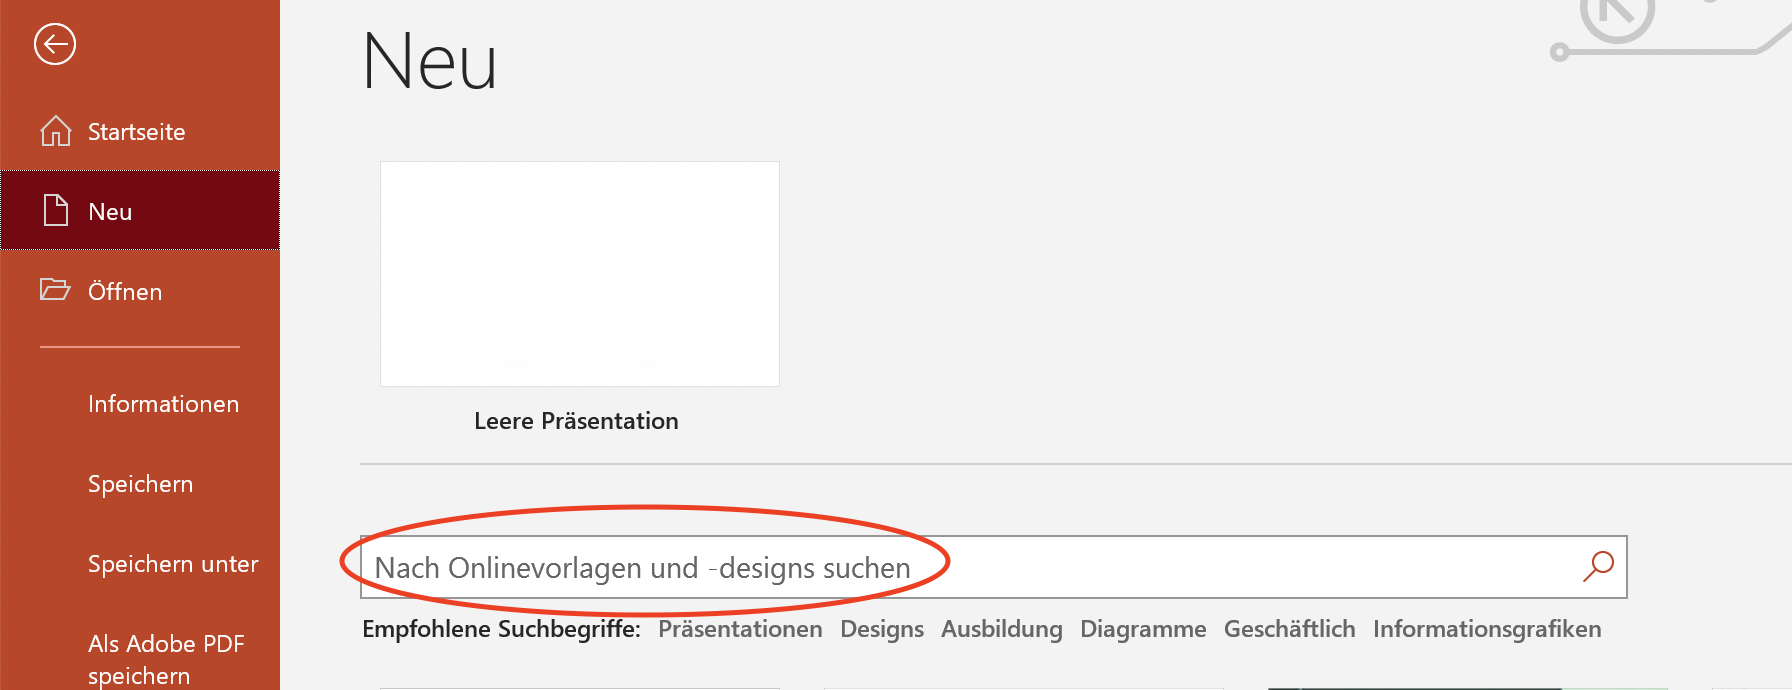
Windows: To find an accessibility template, go to the File tab and select the New option. Enter "accessible templates" in the search field and press the Enter key. You can now select a suitable template from the search results. Then select Create in the template preview window.
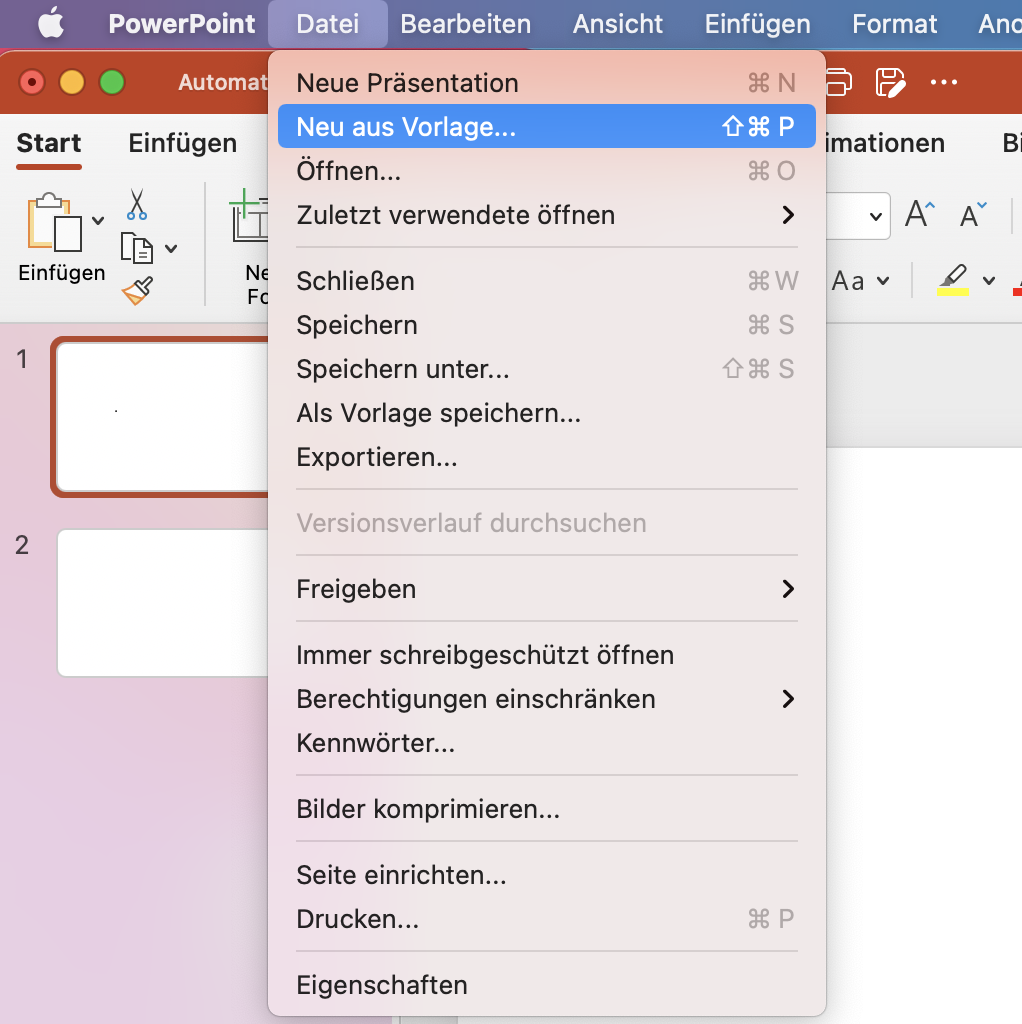
macOS: Go to the File tab on the menu bar and select the New from template... option. option. Enter "accessibility templates" in the search field and press Enter. You can now select a suitable template from the search results.
Use of slide titles
Slide titles help blind and visually impaired staff, people with reading difficulties to navigate between the individual slides. The list of slide titles can be searched with the help of an on-screen voice output, allowing you to jump directly to the desired slide. You should therefore give each slide a meaningful title.
If you do not want the slide title to appear on a slide for visual reasons, you must still set it so that it can be recognised by a screen reader. You can simply place it outside the slide. To do this, proceed as follows:
Lower the zoom percentage so that the margins are visible outside the slide. Use the mouse to point to the frame of the title placeholder field. The mouse pointer then appears as a pointer with four arrows pointing outwards. Now drag the title placeholder outside the slide border and drop it there.

Document properties
Precise information about a presentation helps people with a visual impairment to manage it better. This includes properties such as title or authors that should be added to each presentation. You can find and change these settings under the following path:
Windows: Via the File > Information tab.


macOS: Via the menu bar File > Properties. In the window that opens, you can now enter the document properties under Summary.


Accessibility check
The accessibility check is used to search for elements in a presentation that are not accessible.
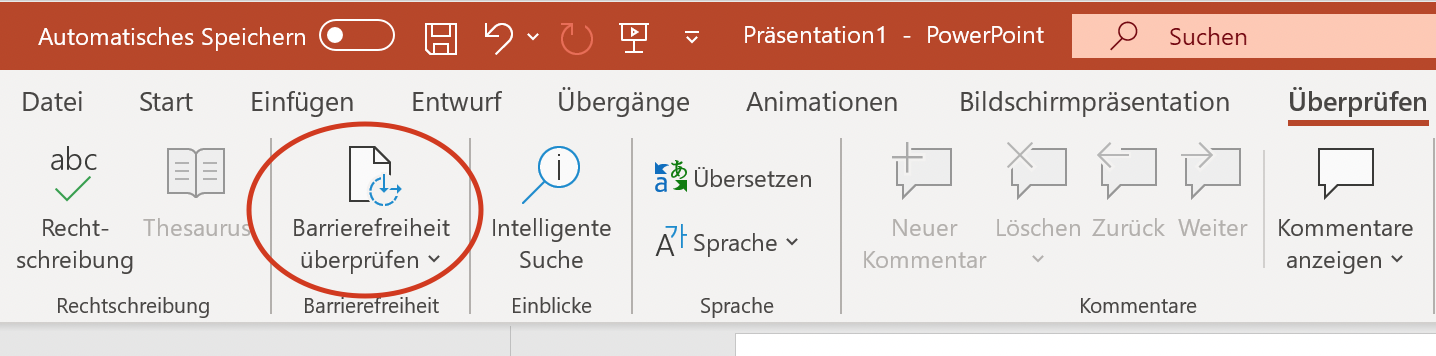
Go to the Check tab and then to the Check accessibility item. You will be displayed a list of errors, warnings and tips as well as the corresponding recommendations on how to correct them. If you now select a displayed problem, you will find out why you should fix it and the exact procedure for doing so will be displayed.
Even if the majority of accessibility problems are recognised by the automatic accessibility check, there are some exceptions. It is therefore important to check the document again manually. Our portal describes the schemes we use to check documents for accessibility.
PDF export
Once you have checked your presentation for accessibility, it can now be exported as a PDF document. It is important that the presentation is exported as a PDF with the appropriate settings as otherwise the entire accessibility information will not be transferred to the PDF.
Windows: Go to File > Export > Create PDF/XPS document. A new window opens in which you can select the storage location. However, before you save the file, click on the button Options.... Another window opens. Tick the checkboxes Document properties and Document structure tags for accessibility and confirm with OK. The window then closes and you can now click on the Publish button. The file is now saved.
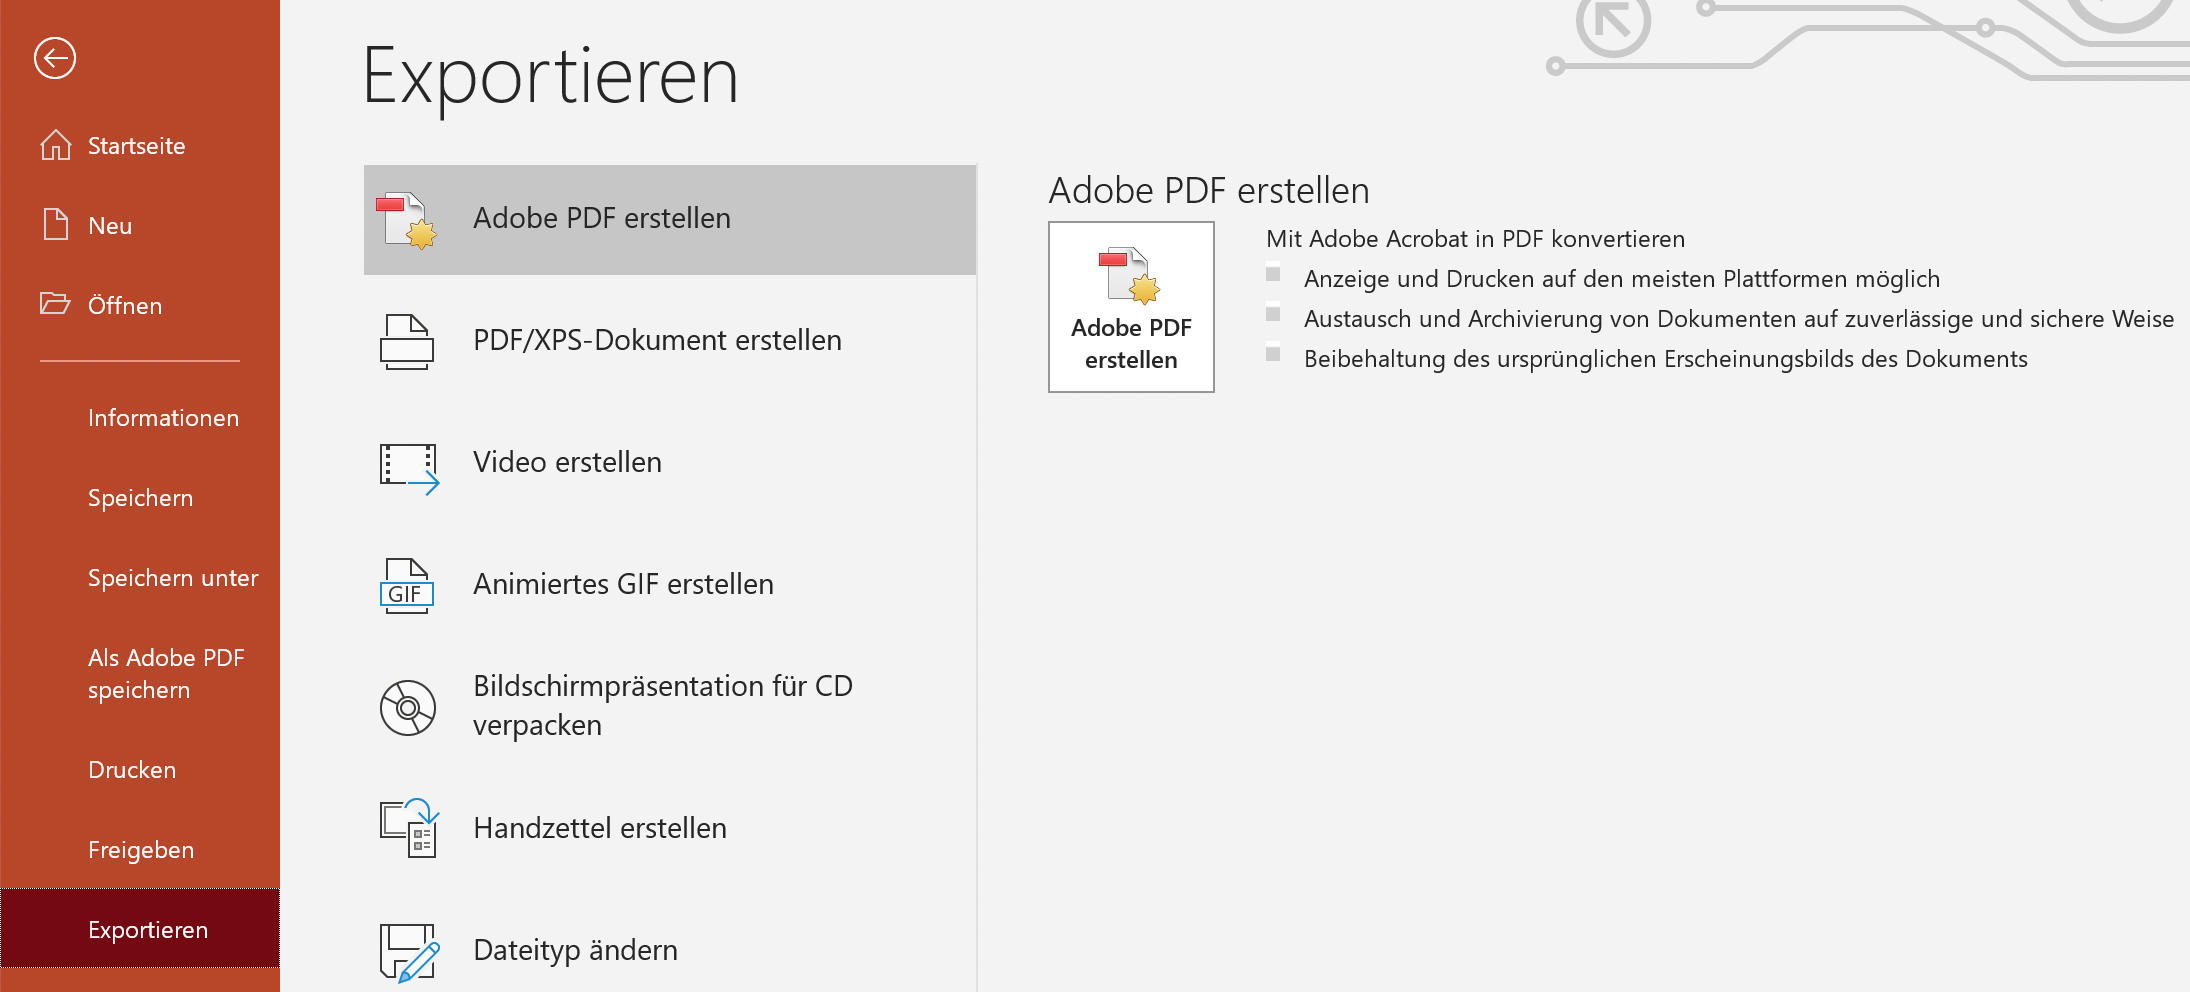
This function is not yet available on macOS. However, an alternative is to use the Acrobat Pro programme. Download this in advance. The new Acrobat tab will then appear, which you can use to export your presentation in an accessible format.

Tables
Tables in documents in particular can be a major challenge for people with visual impairments. The structure should therefore be as clear as possible. The following points will help you to make a table as clear and accessible as possible.
Use of titles and alternative texts
Titles and alternative texts help people with visual impairments to understand tables better and should therefore be used especially for complex tables.
Click anywhere in the table and move the cursor to any one of the eight points at the edge of the table. Right-click on this and select the option Edit alternative text ... option. An input field appears on the right in which you can enter a suitable alternative text.


Division into smaller tables
Particularly large and complex tables cannot be optimally read aloud by a screen reader. Therefore, if possible, these should be divided into several small tables.
First column


In many tables, the first column contains headings that describe the content of the table. To ensure that a screen reader can display this correctly, the first column should be marked as such. To do this, go to the Table design tab and tick the box next to First column.
Table heading
The header row of a table should also be marked as such so that it is correctly lectured by a screen reader. Click anywhere in the table and go to the tab on Table design. Then activate the tick for the Header option on the left.

Supplementary information
Each row of a table must have the same number of columns so that content can be assigned to the correct column heading. This means that no table cells should be merged.
Graphics
Each graphic in a presentation must be described by an alternative text, which in turn is read aloud to users of screen readers. Graphics that do not contribute to the content and are only intended to embellish the document do not require an alternative text. These graphics only need to be labelled as "decorative". Screen readers skip these decorative graphics and do not read them aloud. If you add alternative text, you should not rely on the automatically set alternative text, as this usually does not describe the graphic optimally.

To add an alternative text, first select the graphic by clicking on it with the left mouse button. Then go to the Image format tab and select Alternative text. A window will now open on the right-hand side of the interface in which you can insert the alternative text.
Links
If you want to insert a link in your presentation, it should be able to be read out clearly by a screen reader. Especially for staff, people who use a screen reader, this additional information is just as helpful as an alternative text for graphics. Links should not consist of whole sentences or a single word. Instead, it should contain just enough text so that you can understand from the text what the link is about.
Windows: Right-click on the inserted link and select the Edit hyperlink option. Now you can specify what should appear instead of the link in the Text to display line. Then enter the destination of the link in the Address line. Finally, click on the Quickinfo button at the top right and enter a note about the information that can be obtained via the link.


macOS: Right-click on the inserted link and select the option Link > Edit link. You can now specify what should appear in place of the link in the Text to display line. Then enter the destination of the link in the Address line. Finally, click on the Quickinfo button at the top right and enter a note about the information that can be obtained via the link.


The link is now clearly built into the document and it says "Uni Bielefeld" instead of "www.uni-bielefeld.de", for example.
Lists


If you want to display information clearly in a list, you should use the standard list function. To create a list, go to the desired location in the presentation and select Start > Numbering via the tab. Here you can select the formatting. However, you should not use Roman numerals as these are not read correctly by a screen reader.
Line and paragraph spacing
People with a visual impairment are sometimes unable to recognise text content clearly. To ensure better readability, you should therefore use larger spaces between the lines and paragraphs within a text.
Line spacing: On the tab, go to the Start tab and then to the Line spacing icon. Here you can increase the spacing to 1.5.
Paragraph spacing: Paragraph spacing should not be set manually (by pressing Enter several times). Instead, it should be set in advance and be at least 18 pt. To do this, go to the Line spacing icon again and select Line spacing options ... . A new window will open. Under Spacing, select 18 pt from the To option using the small arrows to the right of the field.


Design your own films
If you do not want to use any of the existing slide templates but would like to design your own slides, you should bear a few points in mind.
The text on the slides and the background colour should have a strong contrast so that staff, people with visual impairments can see and use the content clearly. Therefore, use dark text on a white or beige background, or reverse this and use white text on a dark background.
White and black colour schemes also make it easier for colour-blind staff, people to distinguish between text and shapes.
Add spoken subtitles
PowerPoint offers the option of transcribing the spoken content of the person giving the presentation and displaying it as subtitles during the presentation. This makes it easier for people with hearing impairments or staff, people who speak another language, to follow the presentation. To activate this option, proceed as follows:
On the Slide show tab of the ribbon, select Subtitle settings .
Under Spoken language, select the language in which you will be presenting. Under Subtitle language , select the language in which the subtitles are to be displayed. Then specify the desired position of the captions or subtitles in the Subtitle settings menu. The default setting is Under the slide. Finally, tick the Always use subtitles option. This can be found directly above the Subtitle settings option.
Now the slide show just needs to be started and the spoken content can be seen on the slides.
